Good evening how are you? I am so excited to be joining the Bee Arty Design Team so let me introduce myself name is Rikki G or Just Too Obsessed, depending on where you
follow me. I live in Western Australia with my family DH Scott, my
children Tristan , Ethan, Amelia and fur baby Jax.
I have been scrapbooking since 1996 and really started to document life
when I had my first son, now its more than a hobby it has become a lifestyle. I
started the design team journey in 2011 and to be honest I haven’t looked back.
I love being on design teams I love the creative process and how it pushes my
work out of a comfort zone and allows me to promote some amazing products.
I love sharing knowledge with people and teaching in my local scrap
store has been a great growing experience, I love hearing people saying, “I
didn’t think of that” and “I didn’t think I could do that!”.
My style, well there’s a Pandora's box…. I love everything from fussy
cutting to mixed media and then anything in between, anything creative.
You can follow me here:
Blog: https://justtoobsessed-rikki.blogspot.com/
Facebook: https://www.facebook.com/JustToObsessed
You Tube: https://www.youtube.com/channel/UCPcAA2u1Q-IHh31isXi4RqQ
Instagram: http://www.instagram.com/just_to_obsessed
Pinterest: https://www.pinterest.com.au/justtoobsessed/
Now enough about me, its time to show you my first ever design team project......
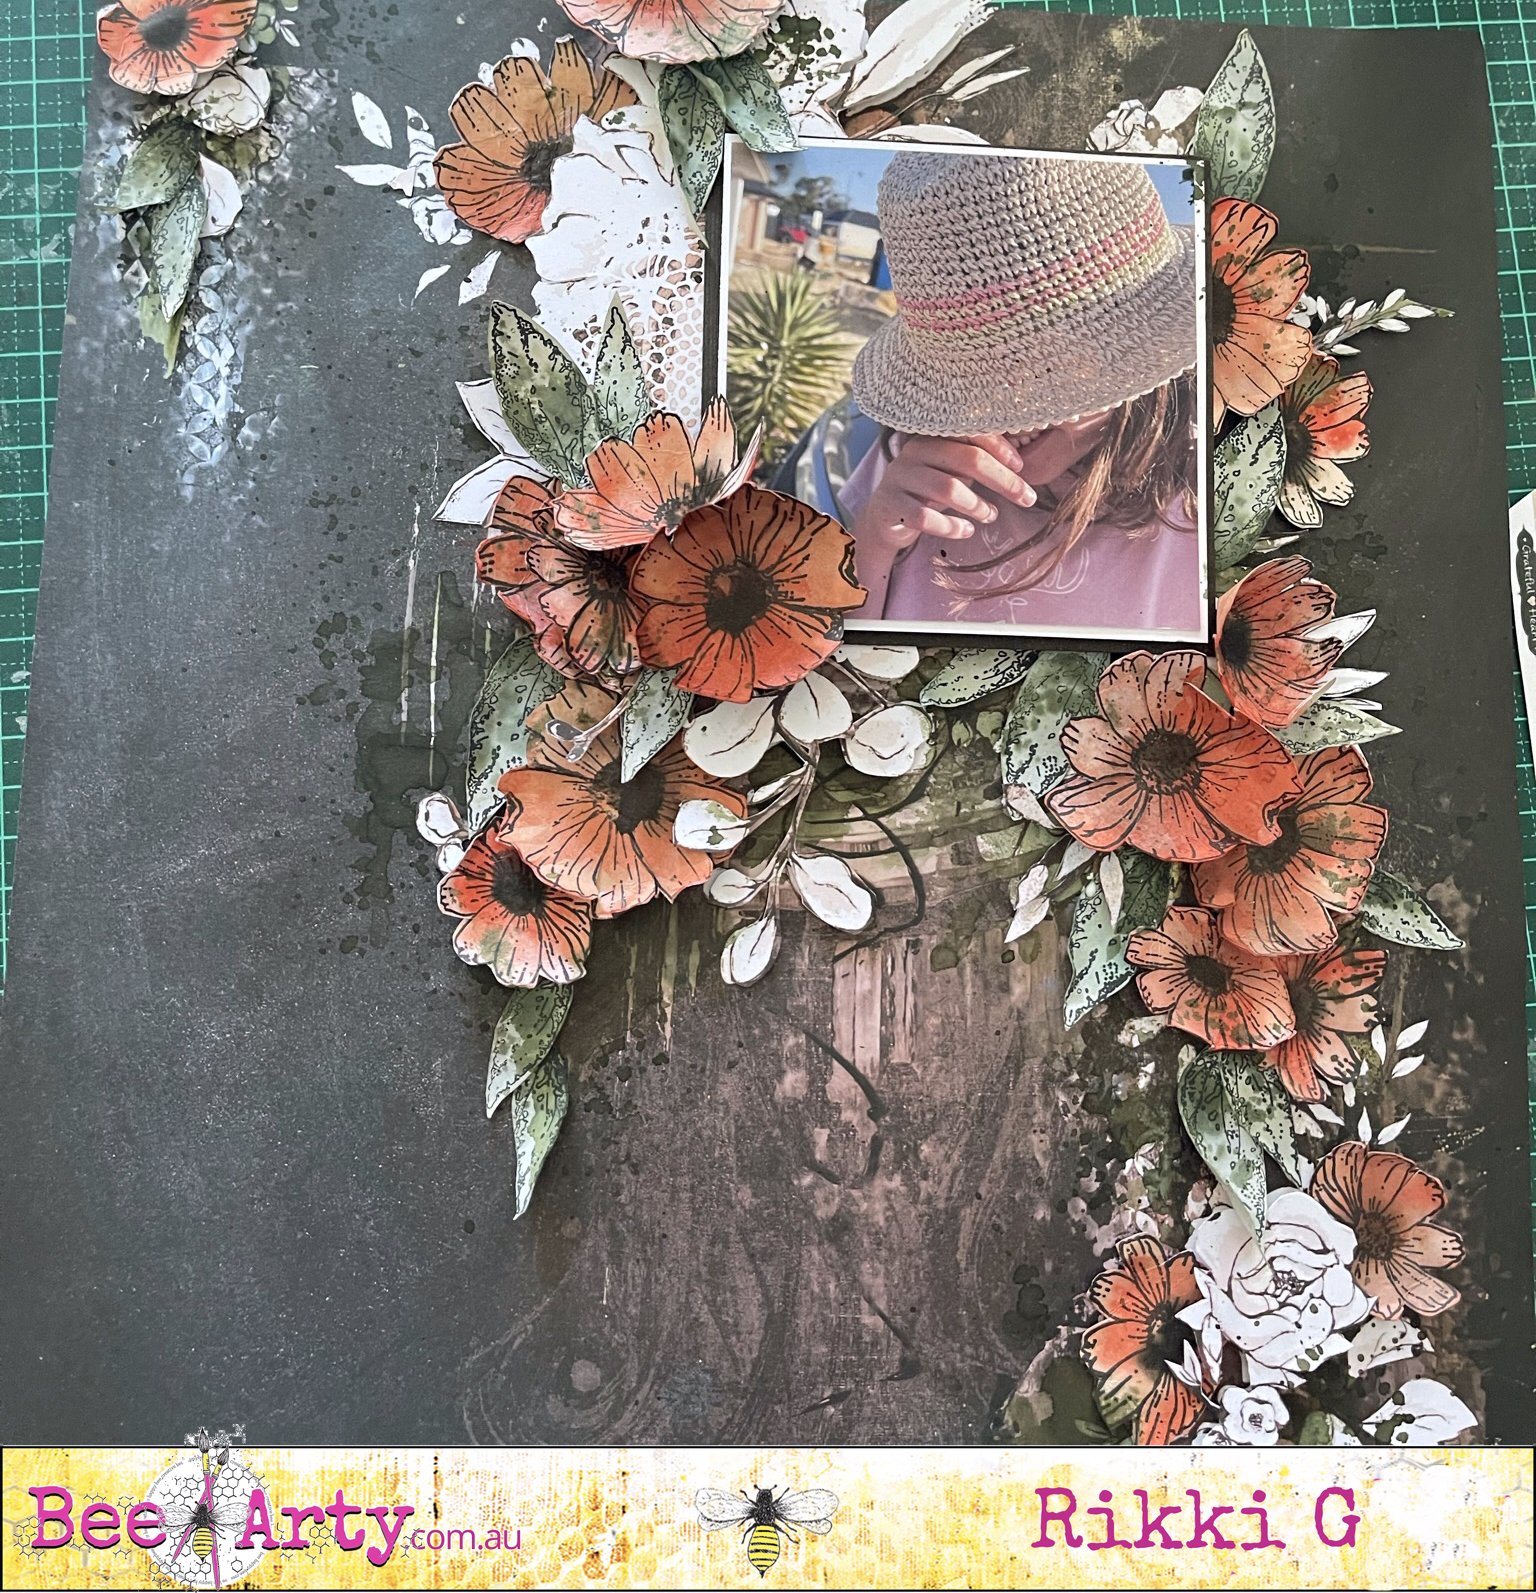
#48/365
To start off my layout I fussy cut out the second piece of the flower and the doily from the piece below, there is method to the madness, I love working with heights so I can add my embellishments in and through the layers. This will be the base in which the photo will rest on.
Plus you might have noticed I have turned the page so it runs vertically.
Now its all about stamping my flowers I used the three different size daisies from the Pretty Poise stamp set on the back "Love'', focusing on the orange scale.
If you dont want to waste another piece of paper stamp on the back of the ''Hope".
*** Use any archive ink as it wont run when you add other mediums.
Once you fussy cut out the flowers your ready to colour... I am using the Colour Artist Dye Inks.
Now if your patient leave them to dry naturally this will allow all the puddles of colour to be more intense.
While you wait stick the fussy cut doily down over the top of the background sheet.
Once dry its all about sculpting your flowers into a 3 d shape rather than flat.
Stamp and cut out leaves from the "Perfect Petal" Stamp set.
Once they are coloured use a combination of the Oasis, Citrus and a small touch of Walnut Colour Artist Dye to make a olive green mix to colour the leaves, make a fair bit up as you will need to splatter that colour after you construct the layout.
Now its about constructing the layout.....
Now with the left over ink that you made its about splatting over the green leaves and some onto the background as well.
Dont forget to cover your photo so you dont splatter it.
Now add some glue to the center of the flowers and add Art Stone or prills or micro beads.
Colour the art stones with Colour Artist Dye Walnut, dont worry about filling in the colour completely.....
Now splatter and run the Shimmer Spray - Bling, in the centers of the flowers then once you have completed that add it under the clusters of flowers and leaves add a lot and give the page a bang on the table to make it run.
*** With the shimmer spray when you use a paint brush plunge it right the bottom and give it a good mix to pull up the mica powder for a real big hit of gold.
Add glass cabochons to the petals to add like water droplets.
Finsh off with a title.....
Hope
Love
I hope I have inspired you, till next time have a creative day.
Rikki G
xxxxxxxx


No comments:
Post a Comment